Oil bottle cap reuse: It might seem like a small thing, but did you know that creatively reusing your oil bottle caps can actually make a difference? I know, I know, it sounds almost too simple to be true! But before you toss that empty oil bottle, let’s explore some fantastic ways to give those caps a second life and contribute to a more sustainable lifestyle.
For generations, resourcefulness has been a cornerstone of many cultures. Our grandparents knew the value of mending, repurposing, and making the most of what they had. While the convenience of modern disposable culture has somewhat overshadowed this tradition, the spirit of ingenuity remains. Think about it even ancient civilizations found innovative ways to utilize every part of a resource, minimizing waste and maximizing utility.
Why should we bother with oil bottle cap reuse in today’s world? Well, the answer is multifaceted. Firstly, it’s about reducing plastic waste. Plastic pollution is a significant environmental challenge, and every little bit helps. Secondly, it’s about fostering creativity and resourcefulness. Finding new uses for old items encourages us to think outside the box and develop problem-solving skills. And thirdly, it can be surprisingly fun! From crafting projects to practical household solutions, the possibilities are endless. So, let’s dive in and discover how you can transform those humble oil bottle caps into something useful and beautiful!
Reusing Oil Bottle Caps: A Guide to Safe and Creative Upcycling
Hey there! Ever wonder what to do with those oil bottle caps after you’ve emptied the bottle? Instead of tossing them in the trash, let’s explore some fun and safe ways to reuse them. I’m going to walk you through a step-by-step guide, ensuring we prioritize hygiene and safety every step of the way.
Preparing Your Oil Bottle Caps for Reuse
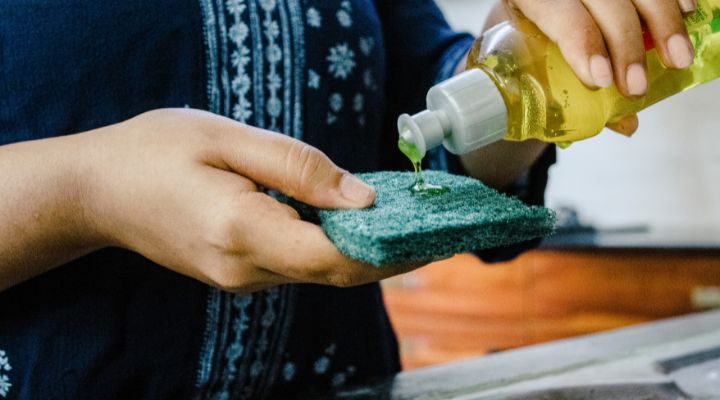
Before we get creative, we need to make sure those caps are squeaky clean and safe to handle. This is super important, especially if you’re planning on using them for food-related projects or with kids.
Cleaning and Sanitizing
This is the most crucial step. Oil residue can be stubborn and attract bacteria, so let’s get those caps sparkling!
1. Initial Rinse: Start by rinsing the caps under hot, running water. This will remove any loose oil or debris.
2. Soak in Hot, Soapy Water: Fill a bowl or sink with hot water and add a generous squirt of dish soap. Let the caps soak for at least 30 minutes. This will help loosen the oil.
3. Scrubbing Time: Use a scrub brush or an old toothbrush to scrub each cap thoroughly. Pay special attention to the threads and any crevices where oil might be hiding.
4. Rinse Again: Rinse the caps thoroughly under hot, running water until all traces of soap are gone.
5. Sanitizing (Optional but Recommended): For extra peace of mind, you can sanitize the caps. Here are a few options:
* Boiling: Place the caps in a pot of boiling water for 10 minutes. This is a great way to kill any remaining bacteria. Be careful when removing them from the hot water!
* Bleach Solution: Prepare a solution of 1 tablespoon of bleach per gallon of water. Soak the caps in the solution for 10 minutes, then rinse thoroughly with clean water. Important: Always wear gloves when working with bleach and ensure proper ventilation.
* Dishwasher: If your dishwasher has a sanitizing cycle, you can run the caps through it. Place them in a utensil basket to prevent them from melting or getting lost.
6. Drying: Allow the caps to air dry completely on a clean towel or drying rack. Make sure they are completely dry before storing or using them.
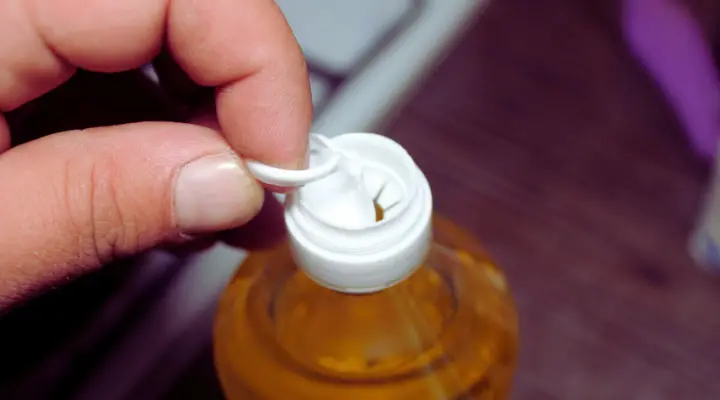
Inspecting for Damage
While you’re cleaning, take a close look at each cap.
1. Check for Cracks or Breaks: Discard any caps that have cracks, breaks, or other damage. These could harbor bacteria or pose a safety hazard.
2. Inspect the Threads: Make sure the threads are intact and not stripped. Damaged threads won’t seal properly, which could be a problem if you’re using the caps to reseal bottles.
3. Look for Discoloration: If a cap is heavily discolored, it might be stained with oil that’s difficult to remove. Consider discarding it.
Creative Reuse Ideas for Oil Bottle Caps
Now for the fun part! Here are some ideas for reusing those clean and sanitized oil bottle caps. Remember to consider the type of oil that was originally in the bottle when deciding on a reuse. For example, I wouldn’t recommend using a cap from a motor oil bottle for a food-related project.
Crafting and DIY Projects
Oil bottle caps can be surprisingly versatile for crafting.
1. Game Pieces: Paint or decorate the caps to use as game pieces for board games or homemade games. You can even glue small magnets to the bottom to use them on a magnetic board.
2. Mosaic Tiles: Cut the caps into smaller pieces and use them to create mosaic art. This is a great way to add texture and color to your projects.
3. Decorative Magnets: Glue small magnets to the back of the caps and decorate the front with paint, fabric scraps, or beads. These make cute and functional fridge magnets.
4. Ornaments: Decorate the caps with glitter, paint, and other embellishments to create unique Christmas ornaments. You can even drill a small hole in the top to hang them.
5. Kids’ Crafts: Oil bottle caps are a great addition to any kids’ craft box. They can be used for building, sorting, and creating all sorts of imaginative projects. Just make sure to supervise young children to prevent them from swallowing the caps.
6. Plant Markers: Paint the caps and write the names of your plants on them. Then, attach them to sticks or skewers and place them in your garden or potted plants.
Household Uses
Beyond crafting, oil bottle caps can also be repurposed for practical household uses.
1. Cord Organizers: Use the caps to wrap and organize cords for electronics or appliances. You can even label them to easily identify which cord belongs to which device.
2. Drawer Dividers: Place the caps in drawers to create small compartments for organizing items like jewelry, office supplies, or makeup.
3. Furniture Levelers: If you have a wobbly table or chair, you can use oil bottle caps to level it. Simply place the caps under the legs until the furniture is stable.
4. Paint Can Sealers: If you have a paint can that’s missing its lid, you can use an oil bottle cap to temporarily seal it. This will help prevent the paint from drying out.
5. Small Parts Storage: Use the caps to store small parts like screws, nails, or beads. This will help keep your workspace organized and prevent you from losing important items.
Gardening Applications
Oil bottle caps can also be useful in the garden.
1. Seed Starters: Use the caps as small seed starters. Fill them with soil and plant your seeds. Once the seedlings are large enough, you can transplant them into larger pots or directly into the garden.
2. Pest Deterrents: Place the caps around your plants to deter slugs and snails. The rough edges of the caps can make it difficult for these pests to reach your plants.
3. Watering Aids: Place the caps around the base of your plants to help direct water to the roots. This can help prevent water from running off and wasting water.
Safety Considerations
While reusing oil bottle caps can be a fun and eco-friendly activity, it’s important to keep safety in mind.
* Avoid Food Contact: Unless you are absolutely certain that the caps are food-safe and have been thoroughly cleaned and sanitized, avoid using them for direct contact with food.
* Supervise Children: When using oil bottle caps for kids’ crafts, always supervise young children to prevent them from swallowing the caps.
* Be Mindful of Sharp Edges: If you’re cutting or modifying the caps, be careful of sharp edges. Use appropriate tools and wear gloves to protect your hands.
* Proper Disposal: If a cap is damaged or no longer suitable for reuse, dispose of it properly. Check with your local recycling center to see if they accept plastic bottle caps.
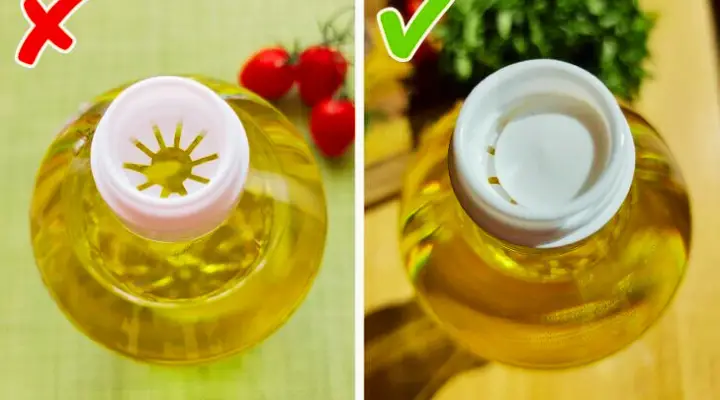
A Note on Different Types of Oil Bottle Caps
Keep in mind that oil bottle caps come in different shapes, sizes, and materials. Some are made of plastic, while others are made of metal. Some have smooth edges, while others have serrated edges. Consider these factors when choosing a reuse project. For example, metal caps might be better suited for projects that require durability, while plastic caps might be better for projects that require flexibility.
Final Thoughts
Reusing oil bottle caps is a great way to reduce waste and get creative. By following these steps and safety guidelines, you can transform those humble caps into something useful and beautiful. So, next time you empty an oil bottle, don’t throw away the cap give it a new life! I hope these ideas inspire you to find even more creative ways to reuse oil bottle caps. Happy upcycling!
“`
Conclusion
In conclusion, creatively reusing oil bottle caps is more than just a quirky craft project; it’s a tangible step towards a more sustainable lifestyle and a surprisingly versatile way to enhance your home and garden. We’ve explored a multitude of applications, from practical organizational tools to whimsical decorative elements, demonstrating that these seemingly insignificant pieces of plastic possess untapped potential. Embracing this simple act of repurposing contributes to reducing plastic waste, conserving resources, and fostering a mindset of mindful consumption.
The beauty of oil bottle cap reuse lies in its adaptability. While we’ve presented a range of ideas, the possibilities are truly limited only by your imagination. Consider variations on the themes we’ve discussed. For example, instead of simply using caps as plant markers, paint them with vibrant colors and intricate designs to create miniature works of art that brighten up your garden. Or, instead of a simple mosaic, try creating a larger, more complex mural using hundreds of caps, transforming a blank wall into a stunning statement piece. Experiment with different adhesives, paints, and embellishments to personalize your creations and make them truly unique.
Furthermore, don’t be afraid to combine different techniques and materials. Integrate oil bottle caps with other recycled items, such as plastic bottles, cardboard boxes, or even old tires, to create even more innovative and functional objects. The key is to approach the process with a sense of playfulness and a willingness to experiment.
Ultimately, the success of any reuse project hinges on community engagement and shared learning. We encourage you to embark on your own oil bottle cap reuse journey and to share your experiences, creations, and insights with others. Post photos of your projects on social media using relevant hashtags, participate in online forums dedicated to upcycling, or even organize local workshops to teach others how to transform these humble caps into something beautiful and useful. By sharing our knowledge and inspiring one another, we can collectively amplify the positive impact of this simple yet powerful practice.
Remember, every small action counts. By choosing to reuse oil bottle caps instead of discarding them, you’re not only reducing waste but also contributing to a larger movement towards environmental responsibility and sustainable living. So, gather your caps, unleash your creativity, and join us in transforming trash into treasure. Let’s make **oil bottle cap reuse** a widespread practice and a symbol of our commitment to a healthier planet.
Frequently Asked Questions (FAQs)
What types of oil bottle caps are suitable for reuse?
Most standard plastic oil bottle caps are suitable for reuse. However, consider the type of plastic. Caps made from harder, more durable plastics will generally be more versatile and long-lasting. Also, check for any cracks or damage before using a cap, as this could compromise its structural integrity. Caps from different brands and types of oil may vary slightly in size and shape, so consider this when planning your projects. For example, if you’re creating a mosaic, using caps of uniform size will result in a more cohesive and visually appealing design.
How should I clean oil bottle caps before reusing them?
Cleaning oil bottle caps thoroughly is essential to remove any residual oil or grease. The best method is to soak them in warm, soapy water for at least 30 minutes. Use a degreasing dish soap to effectively cut through the oil. After soaking, scrub the caps with a brush or sponge to remove any stubborn residue. Rinse them thoroughly with clean water and allow them to air dry completely before using them in your projects. For particularly greasy caps, you may need to repeat the soaking and scrubbing process. You can also use a solution of baking soda and water to help remove stubborn stains and odors.
What are some safe adhesives to use when working with oil bottle caps?
The choice of adhesive depends on the specific project and the materials you’re bonding the caps to. For general crafting purposes, a strong craft glue or hot glue gun is often sufficient. However, for projects that require greater durability or resistance to moisture, consider using a waterproof adhesive or epoxy. When working with children, ensure that the adhesive is non-toxic and child-safe. Always follow the manufacturer’s instructions for application and drying time. Test the adhesive on a small, inconspicuous area first to ensure that it doesn’t damage the caps or the surface you’re bonding them to.
Are there any safety precautions I should take when reusing oil bottle caps?
While reusing oil bottle caps is generally safe, there are a few precautions to keep in mind. Always wear gloves when cleaning the caps to protect your skin from harsh detergents or chemicals. If you’re using sharp tools, such as knives or scissors, to modify the caps, exercise caution and wear appropriate safety gear, such as safety glasses. When working with hot glue, be careful to avoid burns. Supervise children closely when they’re participating in reuse projects and ensure that they’re using age-appropriate tools and materials. Finally, be mindful of the potential for small parts to be a choking hazard for young children.
Where can I find inspiration for oil bottle cap reuse projects?
The internet is a treasure trove of inspiration for oil bottle cap reuse projects. Search online for tutorials, images, and videos showcasing various creative applications. Websites like Pinterest, Instructables, and YouTube are excellent resources for finding step-by-step instructions and innovative ideas. You can also join online communities and forums dedicated to upcycling and recycling to connect with other enthusiasts and share your own creations. Don’t be afraid to experiment and adapt existing ideas to suit your own style and preferences.
How can I encourage others to participate in oil bottle cap reuse?
Leading by example is a powerful way to encourage others to participate in oil bottle cap reuse. Share your own projects and experiences with friends, family, and colleagues. Organize workshops or demonstrations to teach others how to transform these humble caps into something beautiful and useful. Promote the benefits of reuse and recycling through social media and community events. Partner with local schools or organizations to collect oil bottle caps and create collaborative art projects. By raising awareness and making reuse accessible and engaging, you can inspire others to embrace this sustainable practice.
What if I don’t have enough oil bottle caps for a large project?
Collecting enough oil bottle caps for a large project can take time. Reach out to friends, family, neighbors, and local businesses to ask for their contributions. Place collection bins in convenient locations, such as community centers or schools. Consider partnering with restaurants or auto repair shops, as they often generate a significant amount of oil bottle cap waste. You can also explore online marketplaces or classified ads to see if anyone is selling or giving away oil bottle caps. Remember, patience and persistence are key to building up a substantial collection.
Can I recycle oil bottle caps if I don’t want to reuse them?
While reusing oil bottle caps is the most environmentally friendly option, recycling them is still a better alternative than throwing them away. However, not all recycling facilities accept plastic bottle caps. Check with your local recycling program to determine if they accept them and what their specific guidelines are. Some facilities may require you to remove the caps from the bottles before recycling them, while others may accept them as part of the bottle. If your local recycling program doesn’t accept bottle caps, consider searching for specialized recycling programs or organizations that do. Alternatively, you can explore options for donating the caps to schools or community groups that may be able to use them for art projects or other creative endeavors.