Introduction
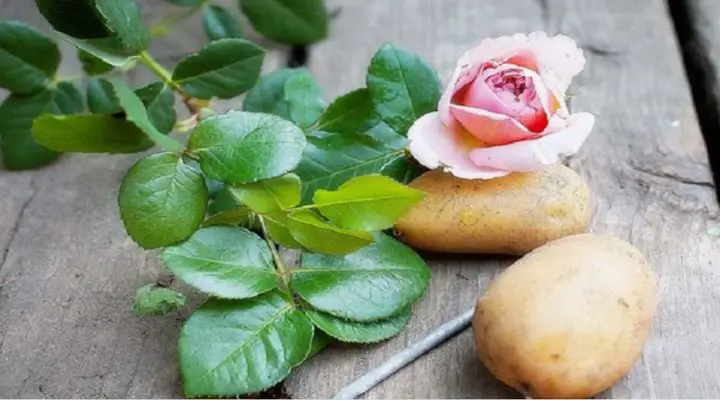
Growing roses can seem like a daunting task, but with a few tricks up your sleeve, you can cultivate beautiful blooms without much hassle. One such trick is propagating rose cuttings in a potato. Yes, you heard that right! This unique method has been gaining popularity among laidback gardeners for its simplicity and effectiveness.
Why Propagate Roses with Potatoes?
You might wonder, why use potatoes to propagate roses? The potato method offers several benefits that make it worth trying. Potatoes provide a moist and nutrient-rich environment, which is perfect for encouraging root growth. This technique is not only fun but also highly effective, especially for novice gardeners looking to expand their rose collection.
Materials Needed
Before diving into the process, gather the necessary materials:
- Healthy rose cuttings
- Medium-sized potatoes
- Sharp knife
- Hormone rooting powder
- Potting soil
- Plant pots or garden bed
- Watering can
Optional materials that can improve success include a plastic bag or a mini greenhouse to maintain humidity.
Selecting the Right Rose Cuttings
The first step is to select the right rose cuttings. The best time to take cuttings is during late spring or early summer when the roses are actively growing. Choose healthy stems that are about 6-8 inches long, with at least three leaf nodes and a few leaves at the top.
Preparing the Rose Cuttings
Once you have your cuttings, it’s time to prepare them:
- Trim the cutting just below a leaf node.
- Remove the bottom leaves, leaving only a couple at the top.
- Dip the cut end in hormone rooting powder to encourage root development.
Choosing the Right Potatoes
Not all potatoes are created equal for this purpose. Medium-sized potatoes with firm flesh work best. Avoid using potatoes that are too small or too large, as they may not provide the ideal environment for the cuttings.
Preparing the Potatoes
Prepare your potatoes by cutting them in half if they are too large. Make a hole in each potato half that is just large enough to insert the rose cutting. Ensure the hole is deep enough to support the cutting without it wobbling.
Inserting the Cuttings into Potatoes
Carefully insert the prepared rose cuttings into the holes in the potatoes. Make sure the cuttings are secure and standing upright. The potato will help keep the cutting moist and provide some nutrients as it begins to root.
Planting the Potato-Cutting Combo
Now that your cuttings are securely in the potatoes, it’s time to plant them. Choose a well-draining soil mix and plant the potato-cutting combo about 4-6 inches deep. Ensure the cuttings are buried enough to support them, but not so deep that they are completely covered.
Watering and Care
Water the newly planted cuttings thoroughly. Keep the soil consistently moist but not waterlogged. Place the pots or garden bed in a location with indirect sunlight. Maintaining the right balance of light and moisture is crucial for successful rooting.
Monitoring Growth
Over the next few weeks, monitor the cuttings for signs of growth. New leaves and shoots indicate successful rooting. If the cuttings appear wilted or show no signs of growth after a few weeks, they may not have taken root. Patience is key, as rooting can take anywhere from 2-4 weeks.
Transplanting to Permanent Location
Once the cuttings have developed a good root system, it’s time to transplant them to their permanent location. Choose a spot in your garden with well-draining soil and adequate sunlight. Carefully dig up the cuttings, ensuring you don’t damage the roots, and transplant them into their new home.
Caring for Newly Transplanted Roses
After transplanting, water the roses thoroughly and keep the soil consistently moist for the first few weeks. Fertilize with a balanced rose fertilizer to encourage healthy growth. Protect the new plants from pests and diseases by keeping an eye out for any signs of trouble.
Advantages of Using Potatoes for Rose Cuttings
Using potatoes for rose cuttings has several advantages. Potatoes help retain moisture around the cutting, reducing the risk of drying out. They also provide a source of nutrients that can boost the rooting process. This method is particularly useful in dry climates or for gardeners who struggle with maintaining consistent moisture levels.
Common Mistakes to Avoid
While the potato method is relatively simple, there are common mistakes to avoid:
- Overwatering or underwatering: Finding the right balance of moisture is crucial.
- Using the wrong type of soil or potato: Ensure you use well-draining soil and medium-sized, firm potatoes.
- Improper cutting preparation: Always use healthy cuttings and apply rooting hormone to increase success rates.
Conclusion
Propagating roses in potatoes is a fun and effective way to grow new plants. This method leverages the natural moisture and nutrients of potatoes to create an ideal environment for root development. Whether you’re a novice or an experienced gardener, this laidback approach can yield beautiful results. So why not give it a try and expand your rose garden with minimal effort?
FAQs
Can I use any type of potato for rose cuttings? While most potatoes can work, medium-sized, firm potatoes are ideal. Avoid using overly small or large potatoes.
How long does it take for rose cuttings to root in potatoes? It typically takes 2-4 weeks for rose cuttings to root in potatoes, depending on the conditions.
Do I need to use rooting hormone? Using rooting hormone is recommended as it increases the chances of successful rooting, but it’s not absolutely necessary.
Can I grow other plants with this method? Yes, this method can be used for other types of plant cuttings that require similar rooting conditions.
What should I do if my cuttings don’t root? If your cuttings don’t root, review the steps to ensure you followed them correctly. Try adjusting the moisture levels or light conditions and attempt the process again.

